

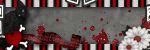
Template used by Toxic Desirez you can get here
Scrap kit Pink-a-licious by Addictive Pleasures you can get here
Paid tube by Elias Chatzoudis you can get here
Font I used Cocktailshaker
Scrap kit Pink-a-licious by Addictive Pleasures you can get here
Paid tube by Elias Chatzoudis you can get here
Font I used Cocktailshaker
Lets get started:
1. Open your template of choice or the one I used and duplicate, close out original.
2. Standing on your circle layer, PP9, selections select all, float, defloat, copy your paper layer
paste as a new layer, now hit selections invert and the delete key on your keyboard. Still standing
on your paper circle, merge down to the original circle layer. Add a drop shadow: 0,0,80,4.00 black.
paste as a new layer, now hit selections invert and the delete key on your keyboard. Still standing
on your paper circle, merge down to the original circle layer. Add a drop shadow: 0,0,80,4.00 black.
3. Frame layer, I left the same and just added same drop shadow as above.
4. Glittered rectangle 1, P1, please repeat the same instructions as your circle layer. Once done,
go to adjust-add/remove noise-add noise uniform checked, 50% and monochrome checked, hit ok. Now
add same drop shadow.
go to adjust-add/remove noise-add noise uniform checked, 50% and monochrome checked, hit ok. Now
add same drop shadow.
5. Rectangle 1- P6, same as instructions #2. Same drop shadow.
6. Rectangle 2- P4, repeat same as above with same drop shadow.
7. Glitter rectangle 2- P11 same as above as well, then add your noise, adjust- add/remove noise-add noise
same settings as above, add your drop shadow.
same settings as above, add your drop shadow.
8. Small rectangle- P12, ok I sound like Im a broken record, lol..but we are still doing the same as
#2 with the same drop shadow. ( when I add papers to an extisting template, I always do the same way with the copy and paste, then invert and delete, this just makes it look more clean and not blurry. Then I
always merge down to the original layer.)
9. Frame 1, frame back 1 and frame 2 and back 2 I left the same as is. All I did was add a drop
shadow. 0,0,80,4.00 black.
shadow. 0,0,80,4.00 black.
10. I added drop shadows to the lollipops and wordart as well.
11. I used Elias artwork, I copy and pasted as a new layer, downsized to match my tag placed her
within my tri-color frame and added a drop shadow of 1,1,30,3.00 black.
within my tri-color frame and added a drop shadow of 1,1,30,3.00 black.
12. On my ribbon I decided to make it look like it was wrapping around my tube. I copied and pasted
the tube, downsized it by 50% or match your tag, then duplicated that ribbon and moved the copied
layer below my girl tube. Standing back on the orginial layer, lower the opacity just a bit so you
can see the girl. Now you can erase the ribbon that is over her head and the lollipop, this will give
that wrap around effect. Now bring the opacity back to 100. Go to your copy layer of the ribbon and
add a drop shadow 1,1,30,3.00 black. There ya go looks like its wrapping around your tube.
13. Standing on the background layer I opened splatter and copy and pasted as a new layer. Standing
on that layer, I duplicated the spatter, image mirror, then merge those 2 layers together, now
duplicate again and image flip. Add drop shadow 1,1,30,3.00 black
on that layer, I duplicated the spatter, image mirror, then merge those 2 layers together, now
duplicate again and image flip. Add drop shadow 1,1,30,3.00 black
14. Now bling it up by adding your elements of choice, your watermark and any copyright info. Since I added the lip lollipop I decided to take off the lollipops on the left side, and add a bow at the end of my lip
lollipops, to give it a different look.
lollipops, to give it a different look.
15. I opened my font size of your desire, stroke set at 0.0, then I picked P1, in your materials pallatte
click on your background, go to patterns and find the paper you choose. Type out your name, then promote to raster layer. Now standing on your name, selections, select all, float, defloat, modify, expand by 4, new layer and flood fill with white, selections none..bring that layer below your paper font layer, add a drop shadow, you can leave like that or even add noise to the white.
click on your background, go to patterns and find the paper you choose. Type out your name, then promote to raster layer. Now standing on your name, selections, select all, float, defloat, modify, expand by 4, new layer and flood fill with white, selections none..bring that layer below your paper font layer, add a drop shadow, you can leave like that or even add noise to the white.
Now you can save your tag as you like, I save mine in a png form unless I am going to use animation. This
leaves that yucky white background off and makes your drop shadows look like they are suppose to.
leaves that yucky white background off and makes your drop shadows look like they are suppose to.
I hope you liked this tut, please check back soon.
Hugss
Hugss


No comments:
Post a Comment